Publishing Network Payments
The Publishing Network offers seamless in-game payments for players, and is simple and fast for you to integrate in your game. Publishing Network Payments are only available to games that have integrated with the Publishing Network Canvas.
When users wish to purchase something in a game, the payment system allows them to securely enter new payment details, or use any payment methods they have used before on the network to complete the purchase. Once a user has made his first payment, any future payments can be completed with one click, reducing friction considerably.
Revenue from these in-game payments is divided with the industry standard split of 70% for you and 30% for PlayerIO and the hosting gamesite.
Overview
Follow these simple steps to get in-game payments in your game:
- Initiate a payment
- Handle callbacks
- Test payments
- Configure payouts
1. Initiate a payment
The Payments system works by showing a dialog on top of the game where the user can see what he is purchasing, add a new payment method, or reuse an existing payment method that was previously entered.

To initiate a payment, your game must call the PublishingNetwork.dialog() javascript function like the below example. For games using PayVault, payments can be initiated directly from PayVault.
The below example will show the user a payment dialog that allows him to buy '150 Spacebucks' for $4.99. When the dialog closes either because of successful payment or failure, the client-side callback will simply log either the transaction id on success, or the error returned.
| Required Dialog Arguments | |
|---|---|
| name | A short name describing the purchase, which will be used as the title of the payment dialog. |
| description | A description of the purchase, which will be shown in the payment dialog. |
| icon | A url that points to a 75x75 px image, which will be shown in the payment dialog. |
| currency | The currency to charge the user in. Currently we only support ‘usd’ |
| amount | The amount to charge the user, in minor units, i.e. cents. For example, if you wish to charge the user $5, this parameter should be ‘500’ |
| transactionid | A transaction ID that you have generated in your game and supplied as a parameter. This will be sent back in both the client-side callback and the server callback, so that you can reference and track the purchase. Transaction IDs do not need to be unique, but we recommend that you make them unique for easier tracking. |
2. Handle callbacks
You will receive a result javascript object that contains information about the purchase in the client-side callback, when the purchase is completed successfully or failed.
The result object will contain the following properties:
| Callback Result Properties | |
|---|---|
| transactionid | The transaction ID that was supplied in the original call to open the payments dialog. |
| error | A string describing why the payment was not completed, either by the user closing the dialog, or the payment being declined, or any other error. If this value is empty, null, or undefined, the payment was a success. |
Remember that you cannot trust client-side data. Only use the client-side callback to indicate to your game that the purchase completed, but do not use it to award the user the items he bought.
Instead, verify a payment and award virtual goods securely with Server Callbacks.
3. Test payments
You can designate any number of users as Payment Admin Users that are allowed to test payments in your game without spending any real money. When anyone of them opens the payment dialog in your game, they will have the option to immediately complete or fail the payment for free.
This allows you to test payments end-to-end, make sure that your integration is complete, and that your game handles all callbacks properly.
To configure Payment Admin Users:
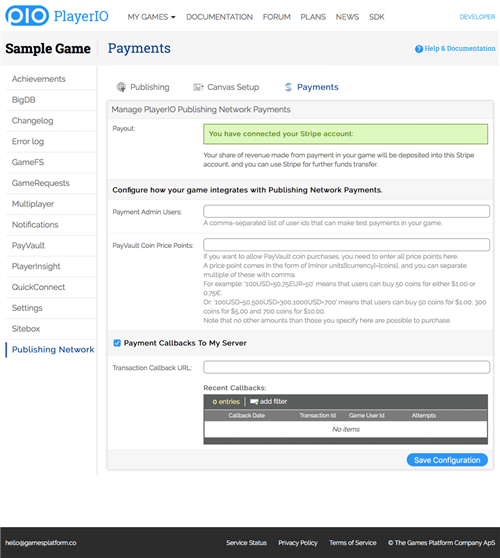
- Go to Your Game » Publishing Network » Payments
- Enter UserIDs of testers in the Payment Admin Users field
You get your own User ID by decoding the UserToken on the canvas page for your game. - Click Save
When you complete a test payment the client-side callback will fire, exactly as if a real payment was made. And if you have enabled Server Callbacks, your test payment will also trigger a callback your server so that you can test that part of the integration.
The Publishing Network » Payments section will also contain a log of the latest callbacks made for each payment, along with the exact data sent, and the response received from your server.
4. Configure payouts
Payouts of the revenue you make from in-game payments are handled through our payments processor, Stripe.
In the Publishing Network » Payments section of your game there is a button to connect a Stripe account to your game. You can either connect an existing Stripe account if you already have one, or you can create a new account just for this. Stripe is available in many countries, and you have to ensure you can create a Stripe account before you can receive any payouts.
All customer disputes and chargebacks will also be handled by Stripe. You can setup your Stripe account to notify you through email, or through webhooks. Please refer to the Stripe dispute documentation for more information.